Friday, March 27, 2009
Daily Art Muse
My work was featured yesterday on Daily Art Muse. Thank you Susan for the unexpected and wonderful write-up!
"Daily Art Muse is an online space where artists find snippets of daily inspiration to keep their creativity flowing." Author and polymer clay artist, Susan Lomoto, writes three or four times each day (Mon-Fri) on art that "tickles my muse and stirs my imagination."
Hop on over and check it out!
Cheers!
Meagan
Coming Soon (I promise) - A two part series on what I've learned about art marketing and self promotion. Stay tuned...
Wednesday, March 25, 2009
American Style Article
Looking for a fun, inspiration read? Check out the April 2009 American Style. Inside you'll find the article "Crafting a Dream House" showcasing the HandMade House, a joint effort by HandMade in America and Biltmore Farms to build a custom home that includes more than 100 artists.
I had the privileged of being a part of this project last fall, and was excited to see an image of my work was printed along with the article!
There's also an interesting article on the woodblock prints of Ilse Buchert Nesbitt and some amazing work in polymer clay.
Happy Reading!
Meagan
.
I had the privileged of being a part of this project last fall, and was excited to see an image of my work was printed along with the article!
There's also an interesting article on the woodblock prints of Ilse Buchert Nesbitt and some amazing work in polymer clay.
Happy Reading!
Meagan
.
Wednesday, March 18, 2009
Correction
So, the two openings I mentioned in an earlier post today are TOMORROW and not today. Guess that's one of the hazards of working for yourself - days start to run together. I woke up convinced that today was Thursday. Luck for me, I now feel like I have a whole extra day to get work done before the weekend. Whoohoo!
Meagan
.
Meagan
.
Opening tonight at the Ocala Civic Theater
I just wanted to let you know about a double opening tonight.
Tonight is opening night for both my exhibition Spring Unfolds and the play No Sex Please, We're British at the Ocala Civic Theatre here in north central Florida. So, if you live in the area you should plan to a night out! My husband and I have had season tickets to the theater the past two years and have been very pleased with all the performances.
This cheeky british farce runs from March 19-April 12. My work will be up for the duration of play and will remain installed for the Marion Ballet Theatre's original production, Princess Style on stage April 17 -19.
Hope you treat yourself to a play, art show, museum visit, concert or other cultural activity this weekend. You deserve a reward for all your hard work!
Thanks for reading!
Meagan
.
Friday, March 13, 2009
Exhibiting at the Appleton Museum of Art
There's great news to share with you! This afternoon I received a phone call from the Appleton Museum of Art here in Ocala, FL. They would like to feature my work this June in their balcony gallery! Needless to say I am very excited about this opportunity!
But this also means that I have 2 1/2 months to make 164 linear feet of work. It's time to get busy. Really Busy! I will be spending even more time in the studio, and even less time on the computer. But when a museum calls wanting to feature your work, you don't say, "let me think about it." You jump in full force with plenty of focus and determination.
Whisper, earthenware clay, low fired crawl glazes, 20" x 16" x 1 1/2"
I do hope to write a post soon on how a little art marketing, self promotion and a positive attitude helped make this opportunity happen. Until then, thanks for reading and sharing the excitement with me! It's going to be a crazy spring time around here. Hang on!
Meagan
.
Thursday, March 12, 2009
Low Fire Clay Slip - Recipe and Technique
A few years ago I started incorporating clay slip trailing into my work and have been having lots of fun with it. Here's the recipe for you to try.
Pete Pinell's White Slip
40 OM4
40 Talc
10 Silica
10 Nepheline Syenite
-------------------------
100
+10 Frit 3124
+7 Zircopax
(You can also add a few drops of sodium silicate - a deflocculant that helps reduce viscosity and makes the slip easier to apply with a slip bottle.)
There are a variety of slip trailing bottles out there in many shapes and sizes. You'll want to experiment with a few until you find the style that you enjoy most. Some things to think about 1) the size of the tip opening can have an effect on line thickness it creates 2) how hard is the plastic? You're could be squeezing for awhile, so you want a bottle that's softer and easier to work with. 3) how much slip do you want it to hold?
Enjoy! I'm off to the studio!
Meagan
PS - More on the materials and process I use can be found here.
.
Pete Pinell's White Slip
40 OM4
40 Talc
10 Silica
10 Nepheline Syenite
-------------------------
100
+10 Frit 3124
+7 Zircopax
(You can also add a few drops of sodium silicate - a deflocculant that helps reduce viscosity and makes the slip easier to apply with a slip bottle.)
There are a variety of slip trailing bottles out there in many shapes and sizes. You'll want to experiment with a few until you find the style that you enjoy most. Some things to think about 1) the size of the tip opening can have an effect on line thickness it creates 2) how hard is the plastic? You're could be squeezing for awhile, so you want a bottle that's softer and easier to work with. 3) how much slip do you want it to hold?
Ron has a great post here on how to construct your very own slip trailer.Try drawing a practice line first to check thickness and to make sure the bottle isn't clogged. A sewing needle can be used to unclog the tip if needed.
Squeeze and draw away! It's a lot like decorating a cake. I like to wait until the clay is leather hard because the clay forms are easier to hold and work with at this stage.
A few glaze fired sample of how glazes will "break" and pool over the slip giving the surface added depth and dimension.
If anyone's interested, I'd be happy to share the above 2 recipes. Just let me know. Hope you're able to do something creative today!Enjoy! I'm off to the studio!
Meagan
PS - More on the materials and process I use can be found here.
.
Wednesday, March 11, 2009
Clay Slab Construction
Today, I thought I would briefly share the basic handbuilding techniques I use to make my Mini Sculptures. There are many different hand building methods and techniques for working with clay, but here are a few of my favorites...
If you have any questions, or other tips for clay slab construction, I'd love to hear from you!
Thanks for reading!
Meagan
.
Clay Tools Needed: rubber rib, scoring tool (or a needle tool), a rubber stylus, wooden rib, slip trailing bottle. All of my work is slab built from lowfire clay. Using a slab roller, I roll the clay out to 1/4" thickness. (Before I had a slab roller I used a rolling pin and 1/4" wooden dowels to keep the thickness even.)It occurred to me one day making biscuits, that the same process could be applied to my Minis. I now have biscuit cutters in a variety of sizes and the process is much, much quicker It also keeps the sizes more consistant. (Don't worry. These aren't the same cutters I use on the weekends for fresh parsley, rosemary and buttermilk biscuits.) Oh, I like the clay to be a little wetter than leather hard when I start work work with it.
Each mini is made up of 2 circular slabs. The base is 1/2 smaller than the top. A rubber rib is used to smooth the surface of the clay. I also like working ontop of fabric interfacing instead of canvus because the weave is finer and leaves the clay surface smooth. The top is then pinched into a small bowl-like shapeThe edges of the top and bottom are scored (aka scratched)......and a slip of the same clay body is brushed on help attach the two pieces. The top is placed ontop of the bottom, carefully working the seams together.
Using a wooden rib, I then go around the piece and smooth and attach the two pieces, conceiling the seam.
Once the piece if formed, I use my rubber stylus to draw/carve decorative lines or veins.
Again, fingers are great for smoothing those lines.
Now, I leave the piece alone until it is leather hard and then incorporate slip trailing/stippling. More on that tomorrow - including the lowfire slip recipe I like to use.If you have any questions, or other tips for clay slab construction, I'd love to hear from you!
Thanks for reading!
Meagan
.
Tuesday, March 10, 2009
Lowfire Crawl Glaze - Cone 04
This has been one of my favorite tried and true crawl glazes for years! Thought I'd share it with you today.
Crawl Glaze
46.5 Gerstley Borate
31 Magnesuim Carbonate
18.6 EPK
3.9 Borax
5.5 Zircopax
____
105.5
For color add...
+1 Red Iron Oxide (beige/pale yellow)
+5 Copper Carbonate (dark turquoise/jade)
+1 Copper Carbonate (light turquoise/jade)
NOTES: Crawls best when applied thick.
For more cone 04 lowfire glaze recipes check here.
Happy Glazing!
Meagan
.
Wednesday, March 4, 2009
Tile Plaque Variation and Process
Finished up some plaques with my newer tile style yesterday. Thought I would post a few quick pics of the process.
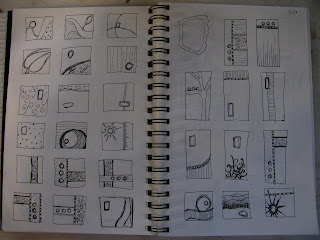
Sketching ideas - thinking about design, layout and composition, line, texture, mood
These clay tiles were rolled out about 3/8" thick so that I could carve a place to inset the glass for slumping. Here the glass has been fused, slumped, ground down to sit flush with the back of the tiles, and then attached with 100% silicone adhesive. (sorry, I forgot to take pictures of all of those in between steps.)
Side few of tiles showing added dimension with the slumped glass.
Finished group of Tile Plaques
The glass I used for these pieces was created the same way as my line of fused glass pendants. I hope to eventually write a post detailing that process and technique. Until then, you can see pictures here.
Thanks for finding a moment in your busy day to check in on what's been going on here.
Best,
Meagan
.
Thanks for finding a moment in your busy day to check in on what's been going on here.
Best,
Meagan
.
Tuesday, March 3, 2009
New Work - In Progress
After a frustrating studio week last week, I think my thoughts have settled down a bit. Whew! I'm feeling much more like myself now.
Here are a few images of the pieces I made while allowing myself to just "play" and enjoy the process. We'll see where they take me. I don't know about you, but for me it can be difficult at times to just create without being overly critical of my creations. Left and right brain interference.
The forms of this wall piece are more involved than my usual work and I incorporated some of the slip stippling that I have been doing on my Minis. I still want to push this idea further, and work on activating the negative space between the 2 forms a little more.
I'm also playing around with the idea of grouping my Minis into different configurations. Here's my first attempt at this.
I fired a bisque kiln off last night, and it's cooling now. It's mostly loaded with this new, experimental work, but there are a couple orders and a few pieces for the solo show I have at the Ocala Civic Theater in a few weeks. In the mean time, I'm switching back to glass work to finish up a few tile pieces. Pictures soon.
Off to the studio!
Meagan
.
Subscribe to:
Posts (Atom)